Quick start: launch your first activity and mark attendance, end to end
Goal
Complete a full operating cycle in one sitting: sign in and pick your school, create your first activity with the wizard, approve a student's registration, confirm their cash payment, then mark them present in the first session — with no help from support.
When do you need this guide?
- You are new to the admin portal and want to see the whole path once before going wider.
- Your school is preparing its first activity season and you want to confirm every link in the chain (create → register → pay → attend) works.
- You are training a new admin and want a single practical scenario that covers the most important screens.
Every step here is deliberately brief; each stage links to a detailed page if you need the depth.
Before you start
- Permissions: your account needs to be able to create activities, review registrations, confirm payments, and take attendance. Together, those abilities usually come with a school-manager-level account or above.
- Email verified: make sure your email is verified so you do not hit access-denied messages — see Signing in and verification.
- The right school selected: if you manage more than one school, pick the target school from the school switcher first.
Step 1: sign in and pick your school
- Open the sign-in screen using your school's dedicated link.
- Enter your email and password, then press Sign in.
- Once you are in, open the School switcher in the top bar and select the school you want to work on.
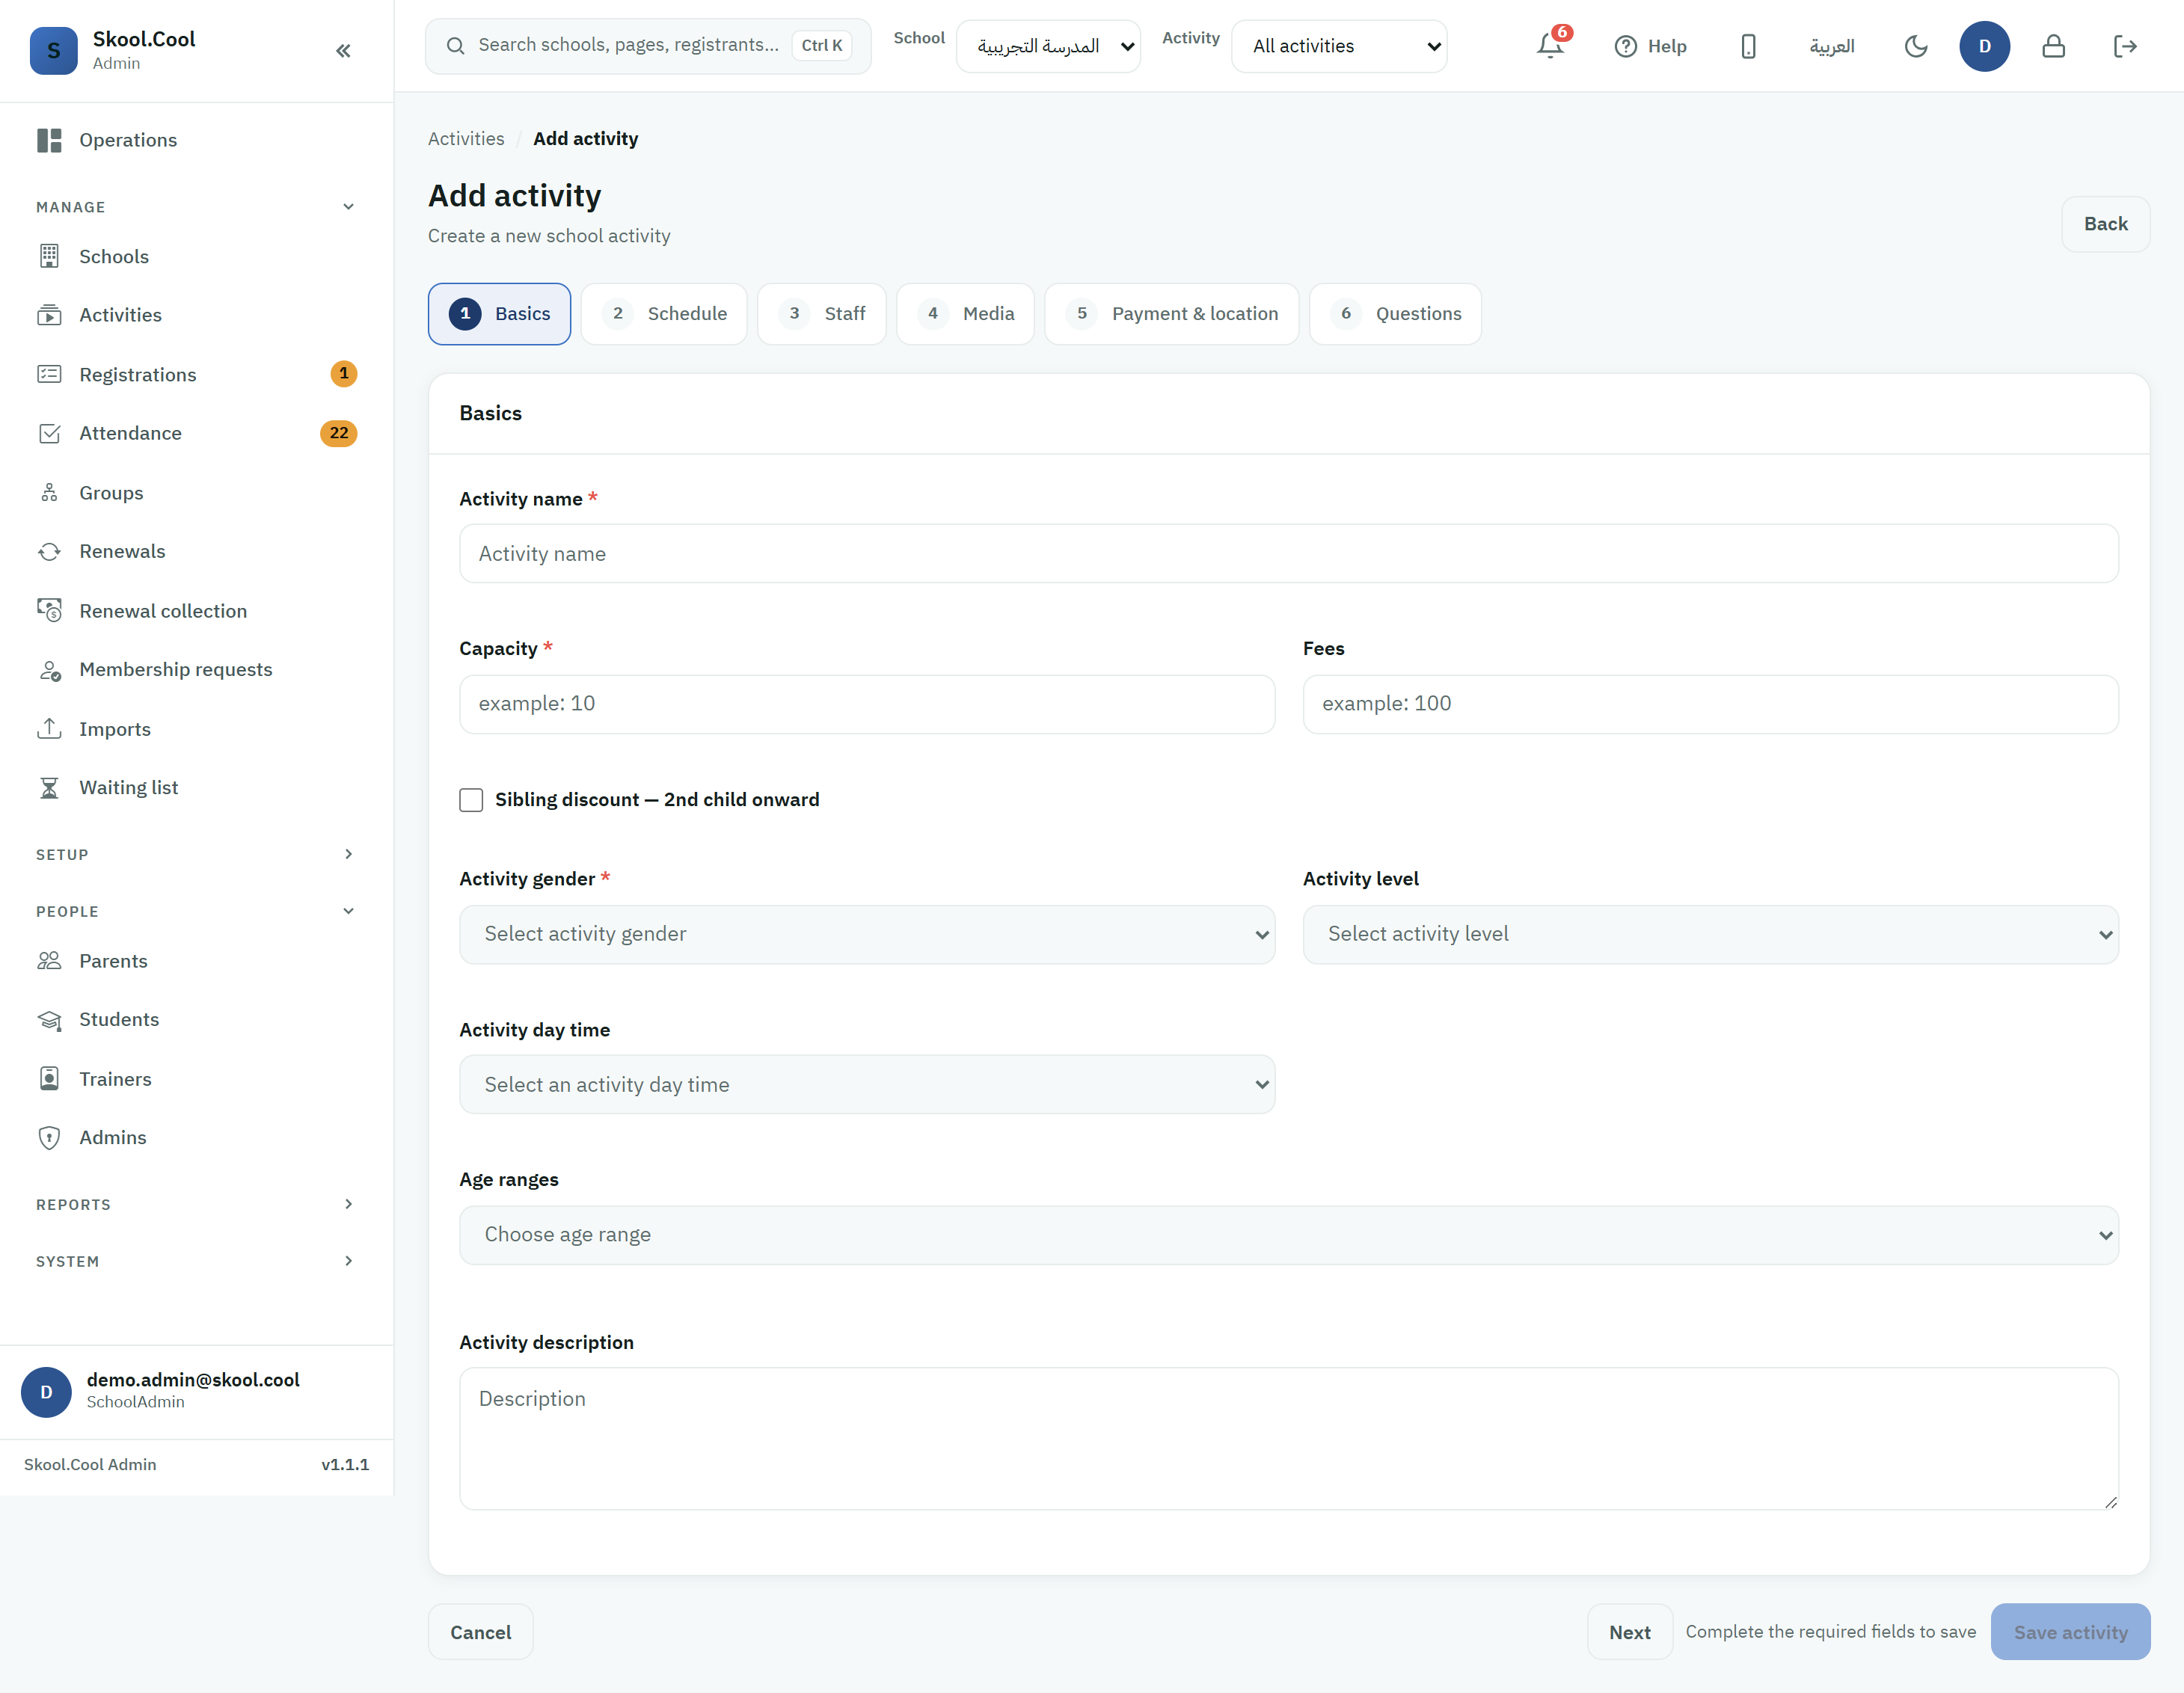
Step 2: create your first activity with the wizard
Path: sidebar > Activities > New activity button (or press Ctrl+K and type "new activity").
The wizard has five steps (or six when Registration questions are enabled for your school), and you move between them with Next:
- Basics: Activity name, Capacity, Fees (SAR), Sibling discount, Activity gender, Activity level, Activity day time, Age ranges (you can pick more than one range), and Activity description.
- Schedule: Start date and End date, and Who can register. The weekly session days and times are not set in the wizard; they come from the Activity schedule screen after you save it — see Scheduling weekly sessions.
- Staff: pick the responsible trainer from Choose trainer, and you can assign Activity admins to review requests.
- Media: upload an optional cover image for the activity with Upload image (5 MB maximum).
- Payment & location: Payment methods (Cash / Online / Free), and Activity location. Press Save activity.
- Questions (optional): this step appears only when Registration questions are enabled for your school, and lets you attach extra questions for the parent to answer when booking. Details in Registration questions.
Step 2b: set the schedule and publish the activity to parents
The activity is created Closed, so parents cannot see it, and it has no sessions yet. Do both before expecting any registration:
- From the activity's actions choose Schedule, set the weekly session days and times, then press Save schedule — see Scheduling weekly sessions.
- Then, from the same actions, press Publish to parents so its status becomes Open and it starts accepting registrations — see The activity lifecycle.
An unpublished activity is invisible, so no registration request will reach you in step 3; and an activity with no schedule has no session, so there will be nothing to mark in step 5.
Step 3: review and approve the first registration
Say a parent has registered their child for the activity through the parents app:
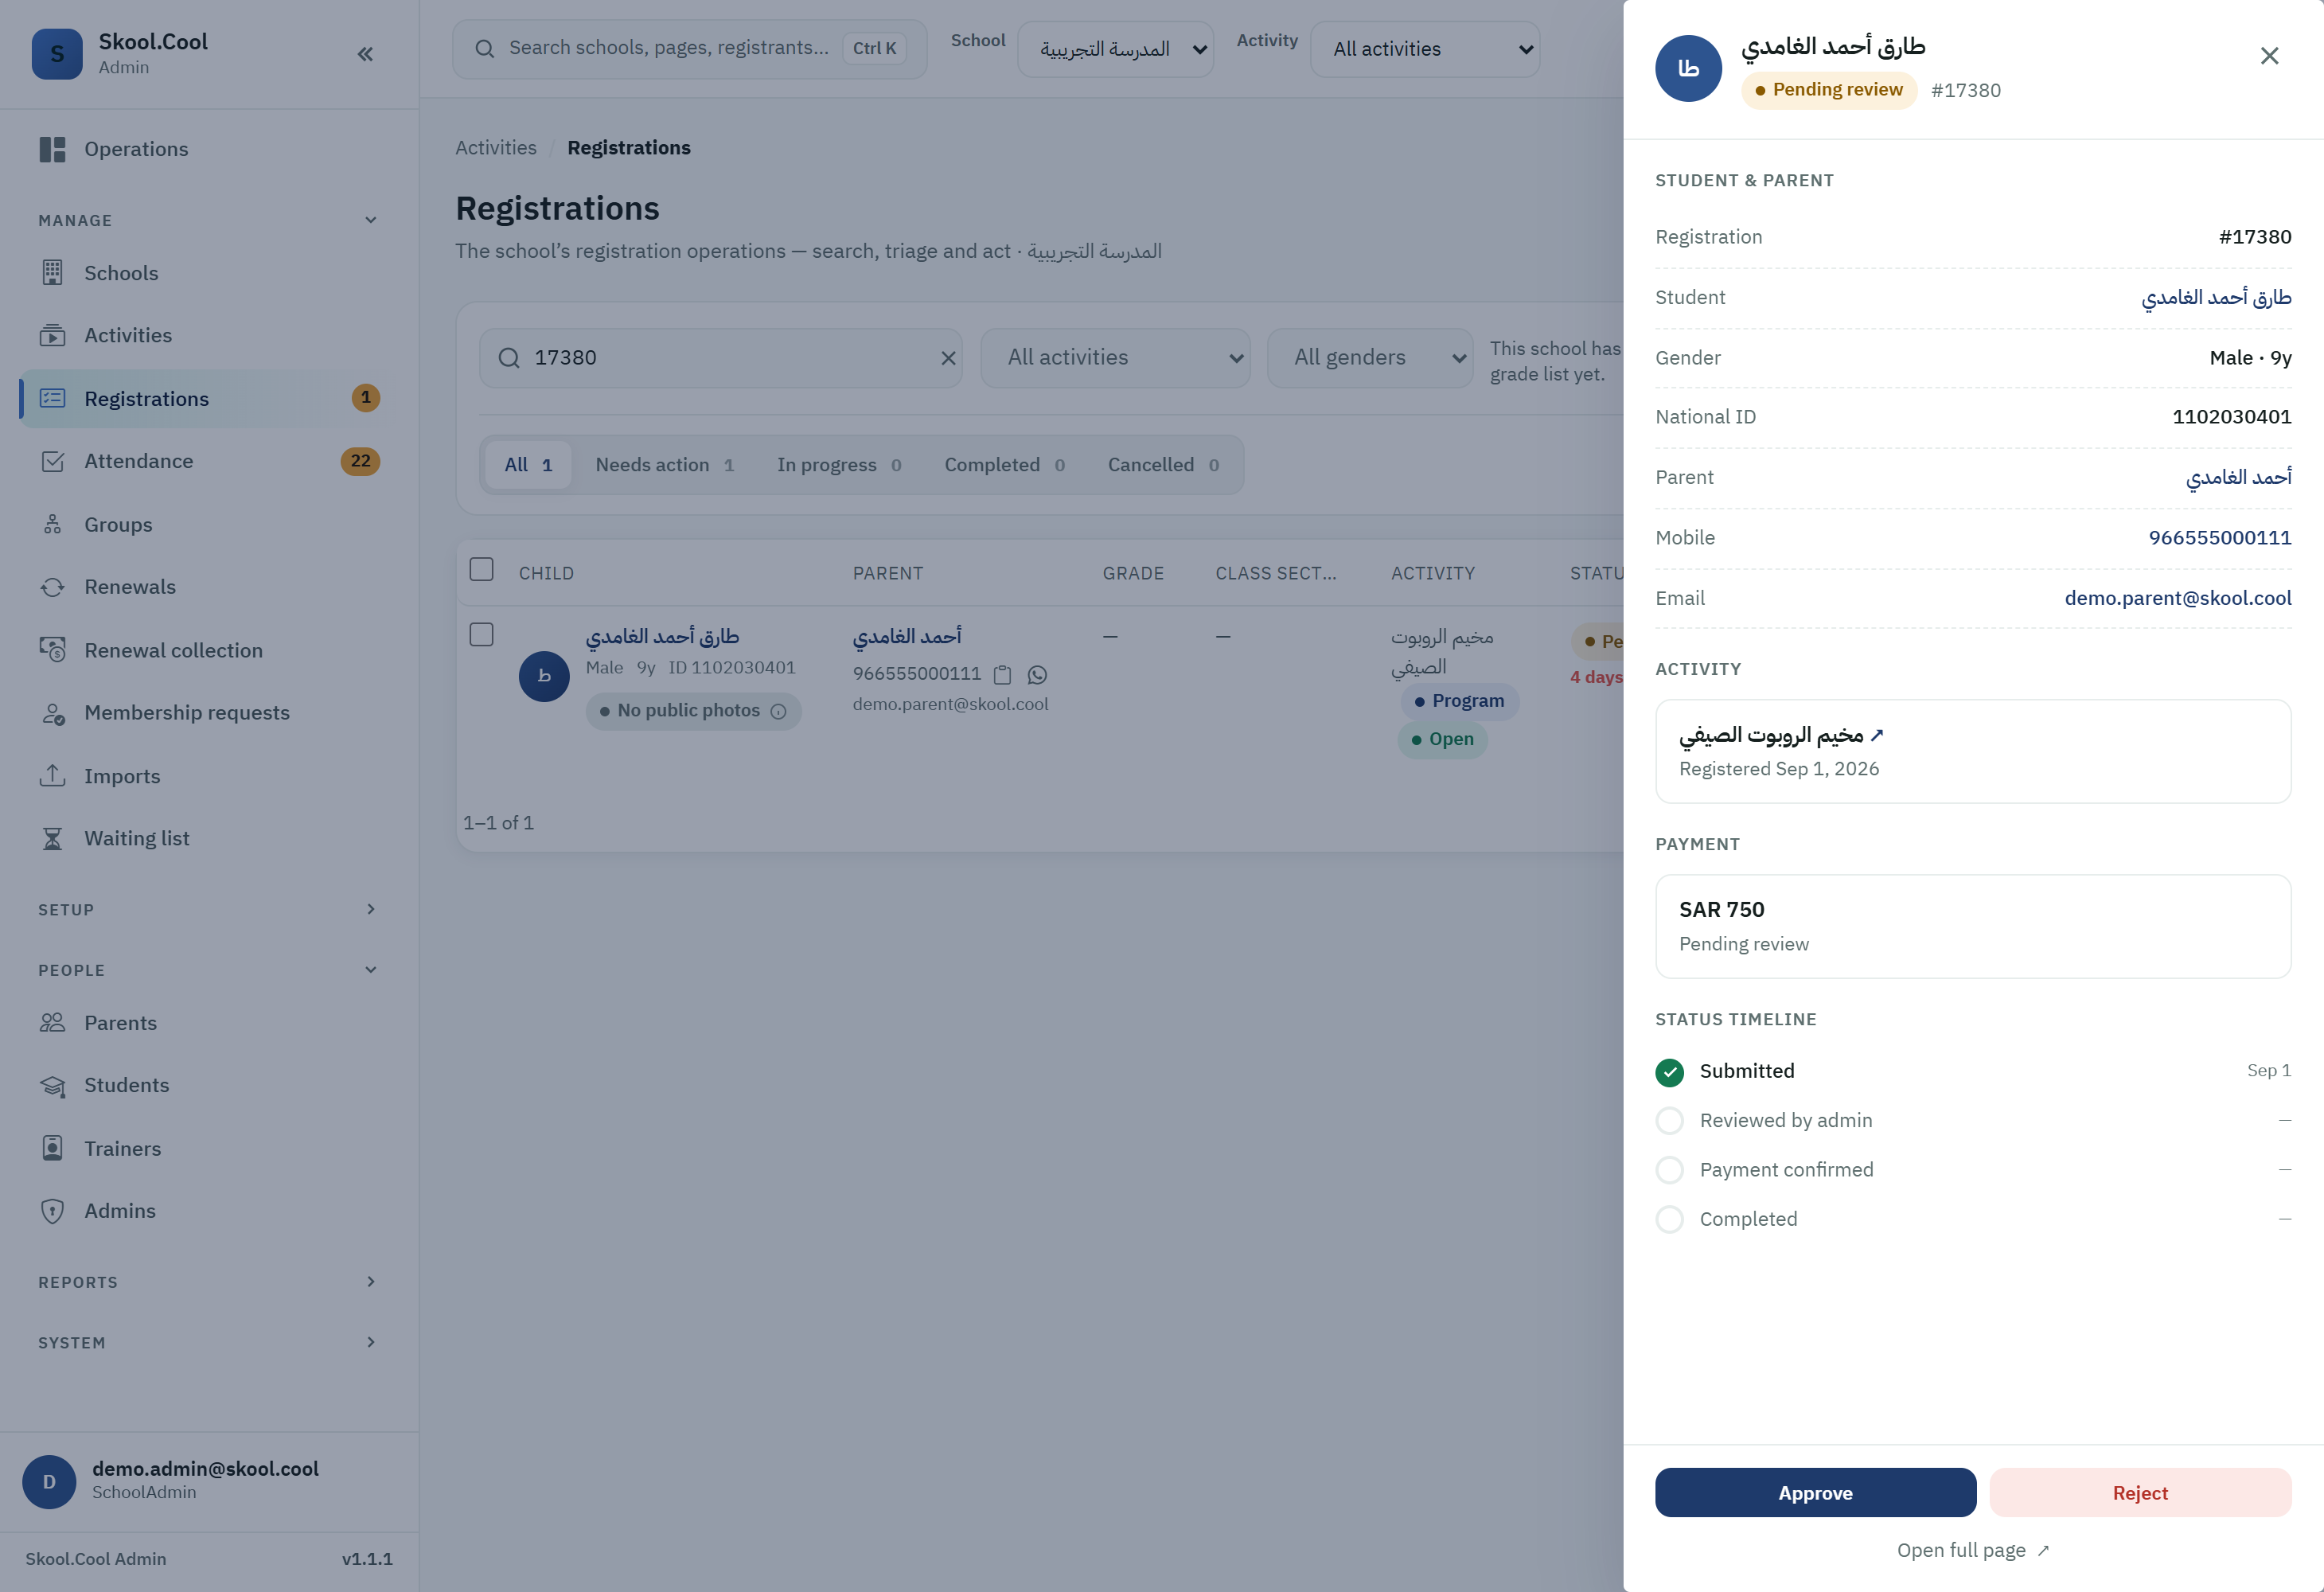
Path: sidebar > Today's work group > Registrations.
- You will find a new request with the status Pending review (it sits under the Needs action triage group).
- Press Manage on the row to open the registration detail panel.
- Press Approve.
- The request's status changes immediately to Awaiting payment.
Full details in Approve a registration and Reviewing and triaging registrations.
Step 4: confirm the cash payment and issue the receipt
The parent brought the fee in cash to the school office:
- On the same row (now Awaiting payment) press Manage, then press Confirm payment.
- In the dialog, enter the paper receipt's serial number in Receipt number (for example
REC-98234), then press Confirm. - The registration's status changes immediately to Paid, and the student is added to the attendance sheet automatically.
If the fee is zero and the parent chose Free, the dialog will not ask for a receipt number, and the enrolment is activated as soon as you confirm.
More in Confirm a cash payment.
Step 5: mark the student present in the first session
The first session has arrived and the student showed up:
Path: sidebar > Attendance > pick the activity, then press Mark (Mark session attendance).
You will not find a session to take attendance for unless you have set the weekly session schedule after step 2 — see Scheduling weekly sessions.
- From the session switcher above the list, choose the date of the session you want.
- The students registered for that session appear (including the one whose payment you just confirmed).
- Next to the student's name, switch their state to Present (or use Mark all present to mark the whole list in one go).
- Attendance saves automatically; the save indicator shows Saving… and then All saved once the background save finishes.
Wider steps in Take session attendance.
What you should end up with
Congratulations — you have set up a complete new activity, published it to parents, approved a student's registration, collected their fee, and marked their attendance in the first session: a full operating cycle from end to end. You can now follow attendance rates and pull their reports from the Reports section in the sidebar — see Attendance reports.
Frequently asked questions
I created the activity but parents cannot see it — why? Because an activity is created with the status Closed by default. Open it and publish it from activity management using Publish to parents so it starts accepting registrations — details in Activity lifecycle.
How many steps does the activity wizard have, and what are they? Five: Basics, then Schedule, then Staff, then Media, then Payment & location, saved with Save activity. It becomes six with a Questions step if your school has enabled registration questions — see Create a new activity and Registration questions.
Where do I find the new registration request? Under Today's work > Registrations; new requests carry the status Pending review and sit under the Needs action triage group. Open the request with Manage — see Reviewing registrations.
The activity is free — do I have to enter a receipt number? No. If the fee is zero and the parent chose Free, the enrolment is activated automatically after you confirm, with no receipt number requested — see Confirm a cash payment.
What is the fastest way to mark students present? From Attendance, pick the activity and the session, then switch each student to Present or use Mark all present; attendance saves automatically and shows All saved — see Take session attendance.