Creating a new activity with the wizard
Goal
Create a new main activity at your school branch and set it up fully, ready to publish and start receiving registrations.
When do you need this?
When the school wants to launch a new course, a new term, or a sports or cultural activity for the coming season.
Before you start
- Make sure the right school is selected from the School list in the top bar.
- If you switch school in the top bar while you are part-way through the form, what you entered stays as it is. Only the Trainers, Activity admins and Payment methods picks that the new school does not have are removed, and a notice at the top of the form names each one so you can pick a replacement. If the new school's lists cannot be loaded, the notice says so and shows a Retry button.
- Make sure the trainers responsible for the activity are already registered in the system, so you can pick them on the staff step.
Where it lives
Sidebar > Activities > press New activity (or press Ctrl+K and type "new activity").
Steps
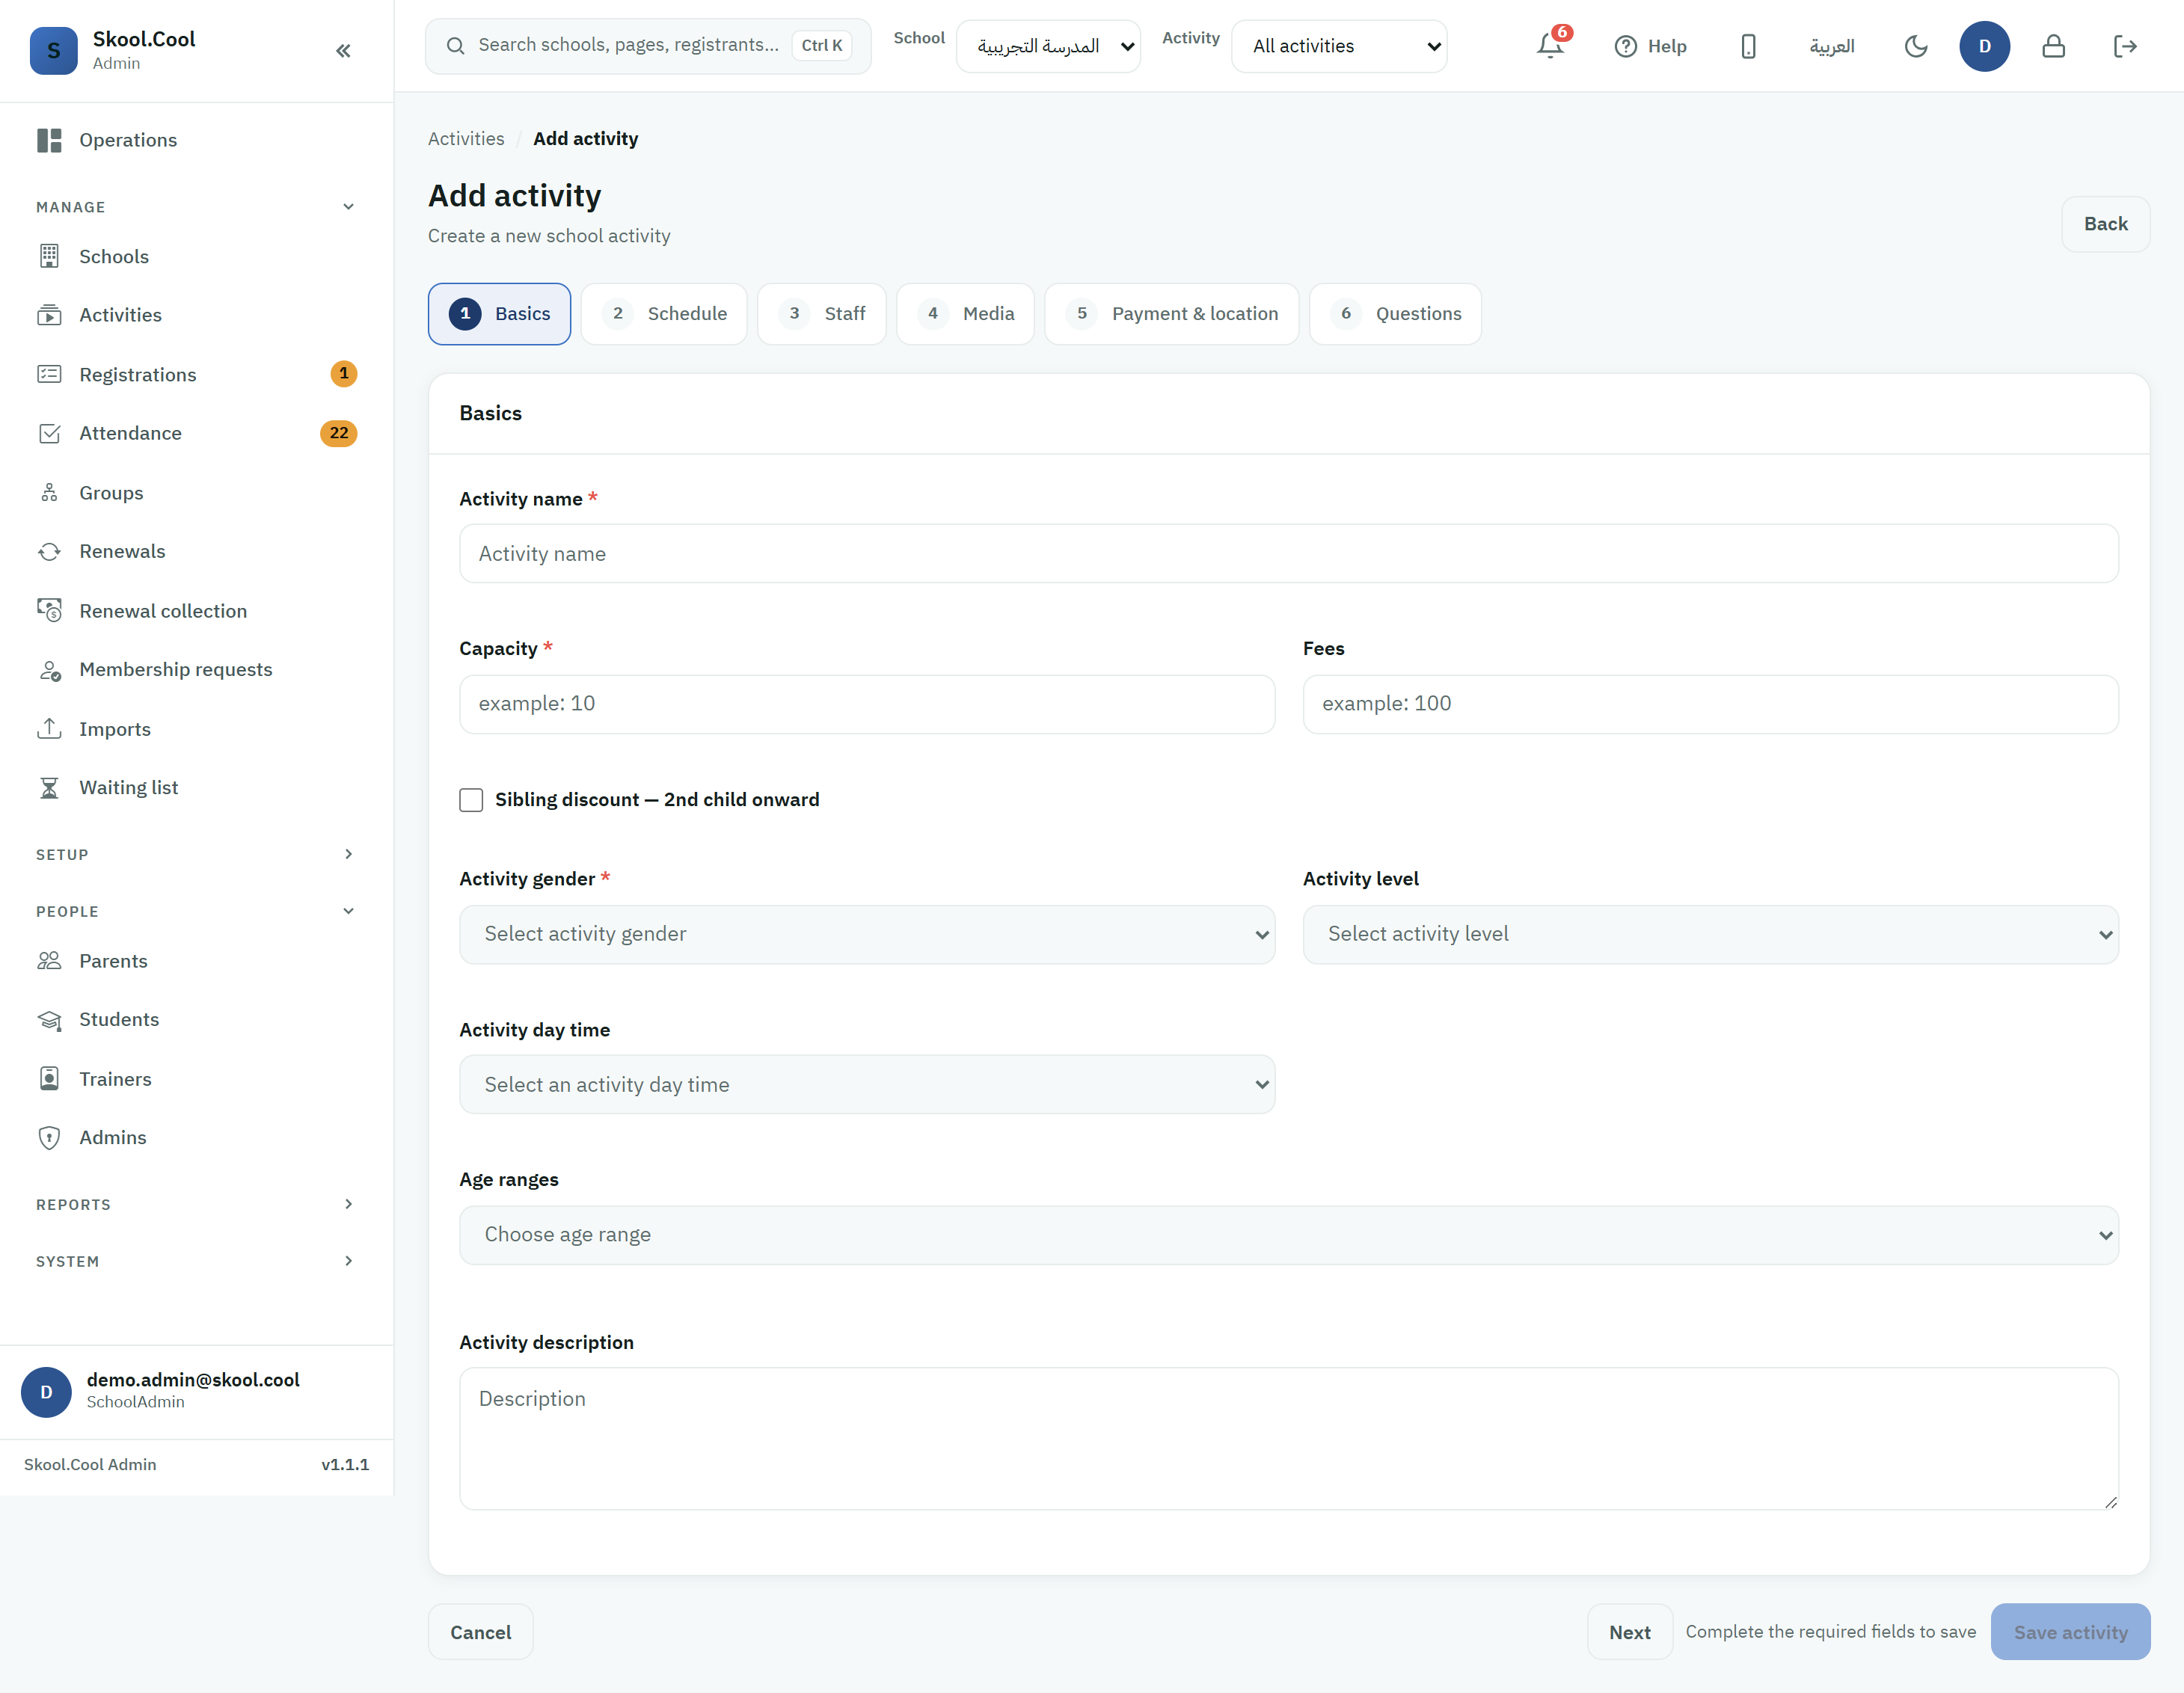
Step 1: fill in the basics (Basics)
- Enter a unique name for the activity in Activity name (for example, "Art and Creativity Club").
- Enter the maximum number of students accepted in Capacity, a whole number greater than zero (for example,
25). - Enter the total enrolment cost per student, including tax, in Fees (SAR) (for example,
400). - Sibling discount — 2nd child onward: if you want to give a discount to families enrolling more than one child, turn the option on, then set Discount type (Percentage (%) or Fixed amount (SAR)) and Discount value.
- Choose the intended gender from the Activity gender dropdown (Male, Female, or Both).
- Set the activity's level from the Activity level list (Basic, Intermediate, Advanced).
- Choose the time of day from the Activity day time list (Morning, Afternoon).
- Set the students' age range by opening the Age ranges list and picking the grades you want. Each option shows the grade and its age span (for example,
KG1 · 3–4 yrs,Grade 4 · 9–10 yrs), and the list also offers All for every age. You can assign several grades to one activity; the ones you pick appear below the list and can be removed. The age span of the grades you pick is what decides who can register, so check the selected grades before saving. - Write the activity's details and themes in Activity description.
- Press Next to move to the following step.
Step 2: set the schedule and the audience (Schedule)
- Set the activity's start date in Start date.
- Set the activity's end date in End date.
- Who can register: choose the activity's audience from the buttons:
- Public: the activity appears in the general marketplace and accepts registrations from anyone.
- School members only: registration is limited to your school's verified students and the activity is hidden from the general marketplace. To learn how students are verified, see School membership and the join code.
- Allowed for parent: turn this on if you want parents to be able to see the activity and register for it from their app.
- Press Next.
The weekly session days and times are not set in this wizard, but from the activity's schedule screen after it is created — see Scheduling weekly sessions.
Step 3: assign staff and trainers (Staff)
- Trainers: pick one or more names from the trainers dropdown to be technically responsible for taking attendance.
- Activity admins: pick the administrative owner from the coordinators list, to handle reviewing and accepting requests.
- Press Next.
Step 4: upload media (Media)
- To upload a cover image for the activity that parents see in their app: click the Upload image field inside the Activity image card.
- Choose the image from your device.
info
- The maximum image size is 5 MB.
- The supported extensions are:
jpg,jpeg,png,gif,webp.
- A preview appears immediately. You can delete and replace it with Remove.
- Press Next.
Step 5: payment and location (Payment & location)
- Payment methods: choose the available payment methods (Cash, Online or Free).
- Activity location: turn on Same as school if the activity takes place at the school itself, or enter an external Google Maps link in New location.
- Press the final save button, Save activity.
- While saving, the button reads Saving activity…, and the form's fields and its Back and Cancel buttons are locked until the answer arrives. If you move to another page meanwhile, the move waits for the save: it goes ahead once the activity is added, and is cancelled if the save is refused or does not complete, so you stay on the page to read why.
If the registration-questions feature is enabled for your school, a sixth Questions step appears, for adding questions the parent answers when registering. The Save activity button is available from any step once the required fields are complete. In the step bar at the top of the form, each step you have moved past shows a ✓ when its fields are complete, or a ! when something on it still blocks saving, so you know where to go back to.
What you should end up with
When the save completes successfully:
- A green confirmation appears: the activity was added successfully.
- The system takes you back to the school's main activities table automatically.
- You will find the new activity added with the status Closed, listed under the activity tree, waiting to be activated and published.
Frequently asked questions
How do I add a new extracurricular activity?
From Activities, press New activity (or Ctrl+K and type "new activity"), then work through the wizard steps and save with Save activity.
How do I set the capacity and the maximum number of registrants? On the first step, Basics, enter the number in Capacity.
How do I turn on the sibling discount for an activity? On the first step, Basics, turn on Sibling discount — 2nd child onward and set Discount type and Discount value.
The activity was created with the status Closed — how do I publish it? An activity is created closed by default; activate and publish it from activity management so it starts receiving registrations — see The activity lifecycle.