Importing students and their guardians from an Excel file
Goal
Add student data in bulk from an Excel or CSV file, linking each student automatically to their guardian's existing account — so instead of entering every student by hand, the school completes a whole list through the Imports wizard, with guided steps that check the data before saving it.
When do you need this screen?
At the start of a season, or when setting up a new school, when you have a list of students and their guardians' mobile numbers and want to register them all at once, ready to place them into activities. Importing students is normally the first step in setting up (students first, then activities, then registrations).
Before you start
- Permission: you need permission to use imports, and specifically permission to import students. If Imports does not appear under the Today's work menu, the feature may not be enabled for your school yet, or you may not have its permission — ask your school administrator.
- A guardian account is a prerequisite: each student is linked to the guardian holding the mobile number in the file, and the import does not create new guardian accounts. If a guardian has no account yet, they sign up themselves in the parents app with that number, then re-import their row - otherwise the row shows the error "No parent with phone ... exists". This is deliberate: a mistyped number must never create an account on a stranger's phone that would show them the child's data.
- File format and limits: the file is Excel (
xlsx) orCSV. The system shows the maximum number of rows and the file size limit directly beneath the upload area; stay within them.
See Reference: import file columns for the fields and validation rules in detail.
Where it lives
Sidebar > Today's work > Imports, then choose the Students & parents card.
On the same page, beneath the import cards, you will find a Membership roster card. Do not confuse the two: this screen creates new student records, while the roster verifies the membership of students who already exist — see Importing the membership roster.
Steps
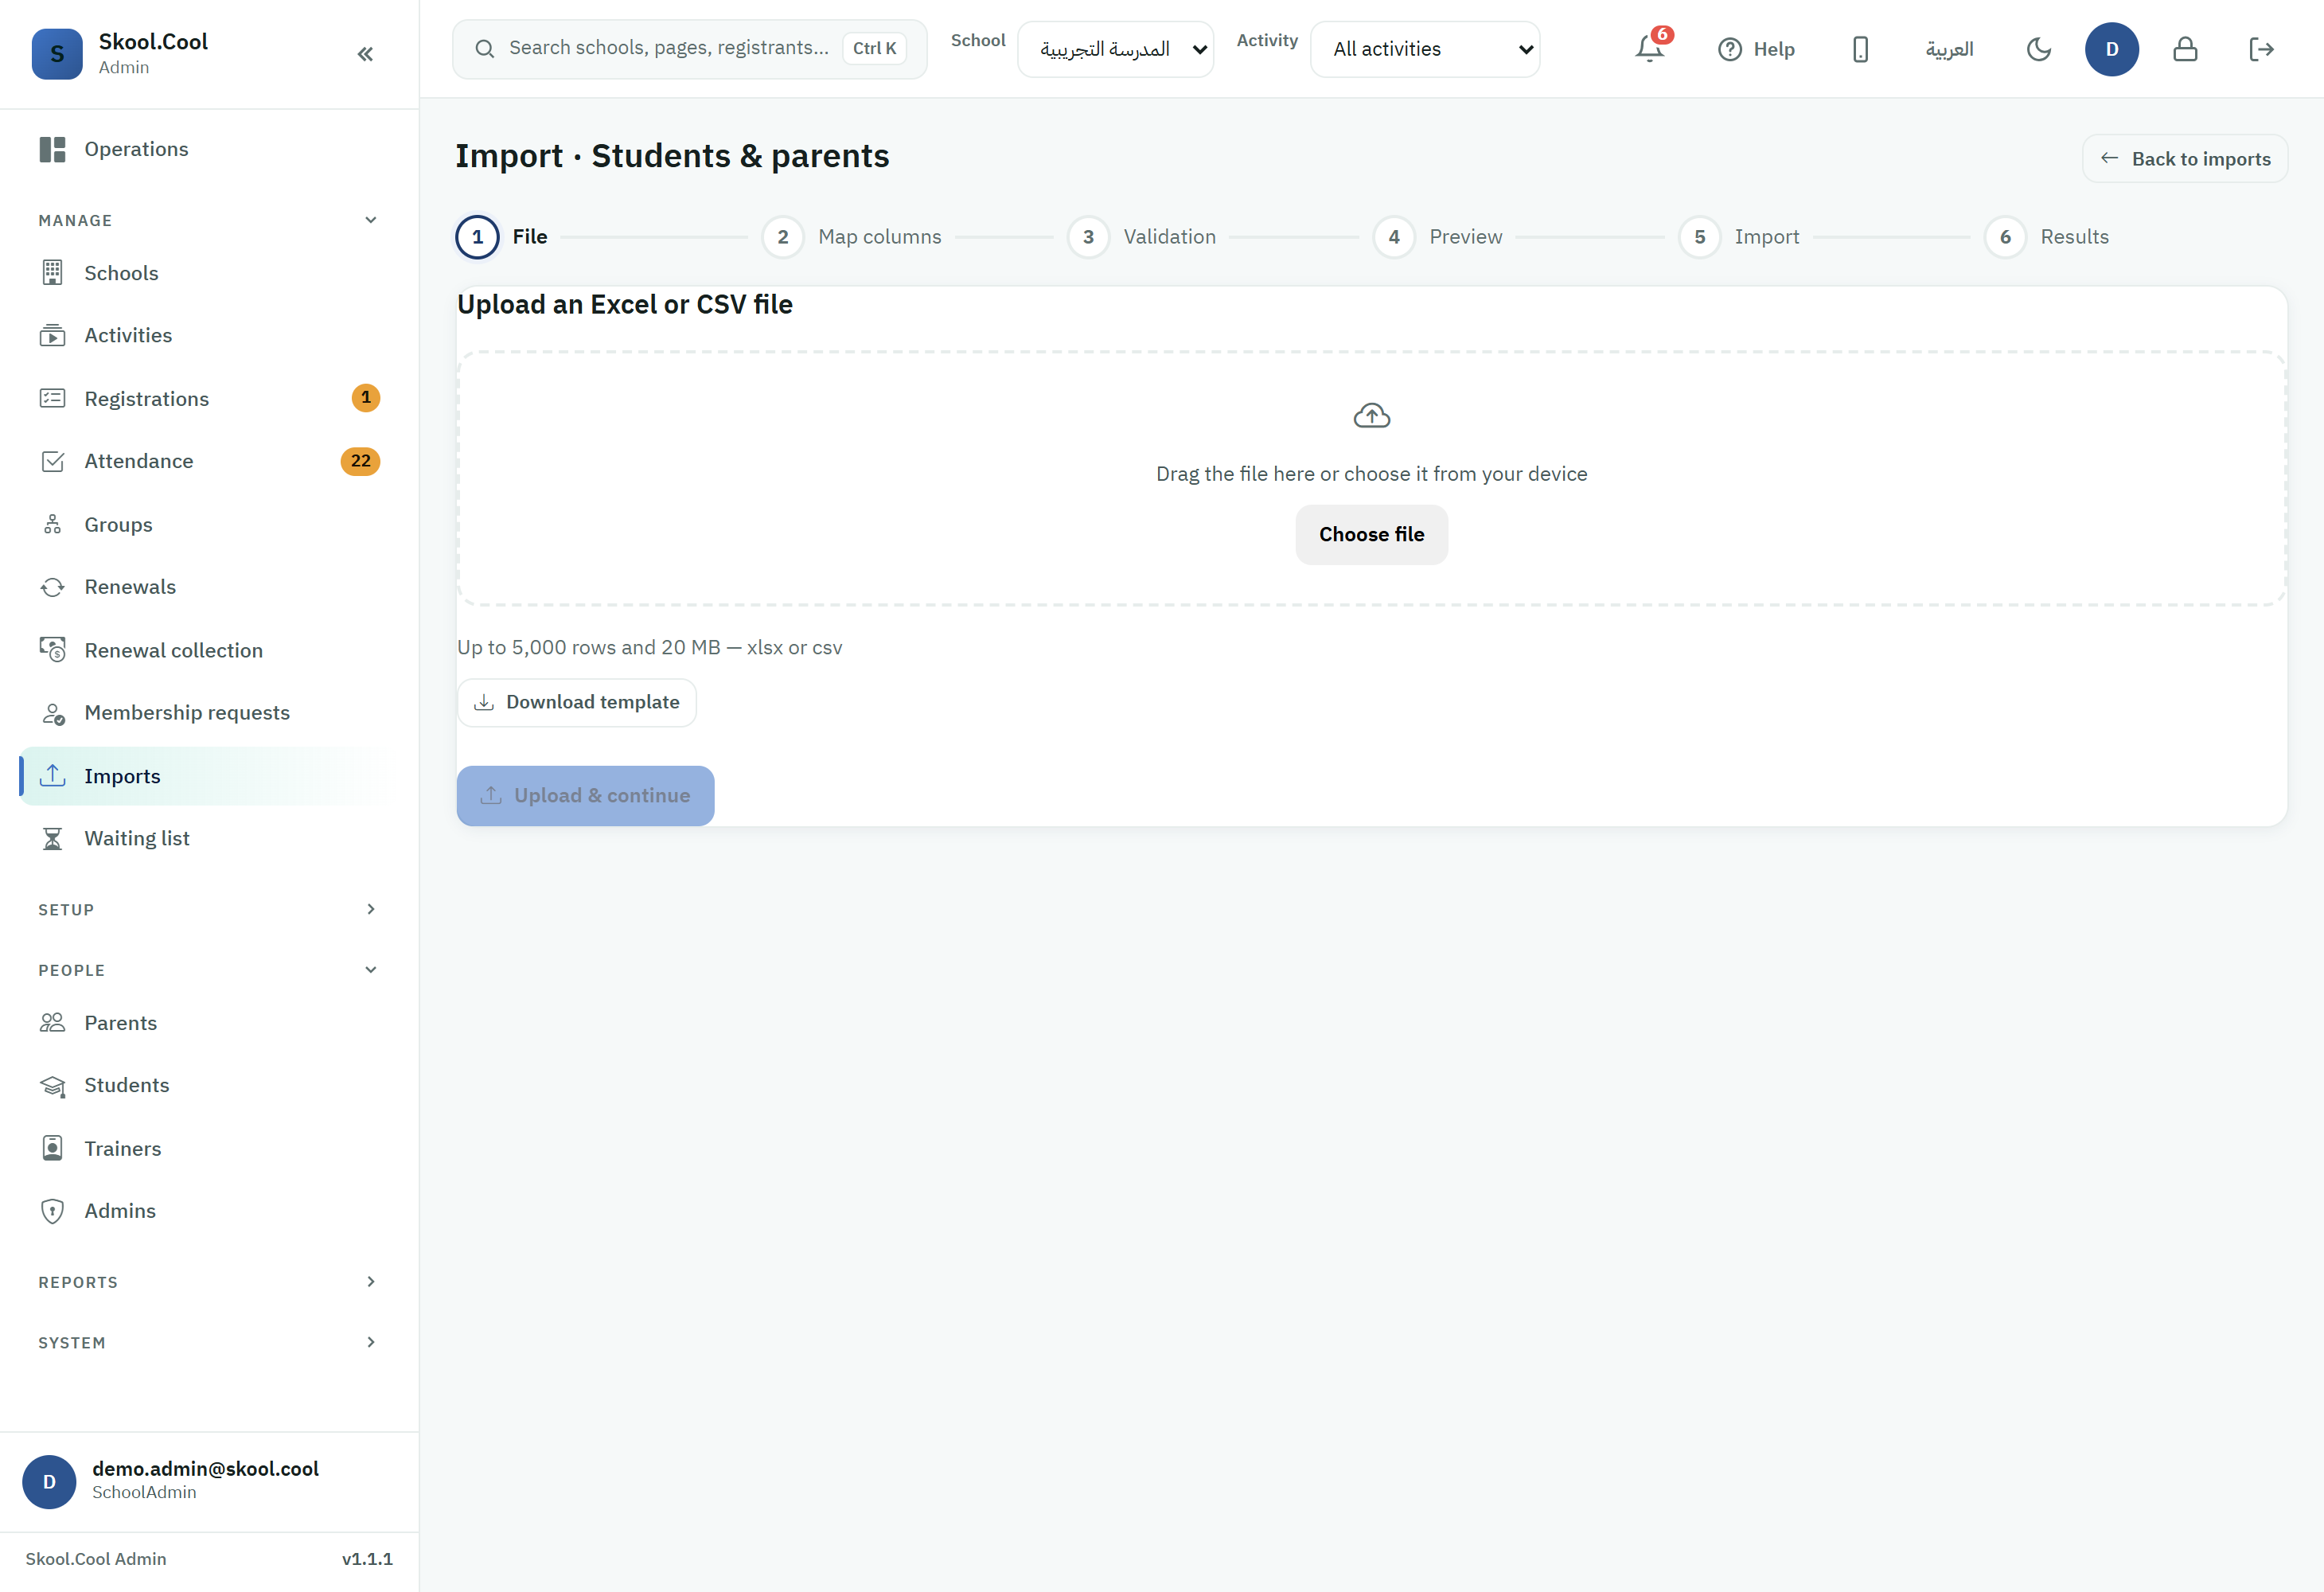
The import works as a six-step wizard shown in a bar at the top: File → Map columns → Validation → Preview → Import → Results.
1. Download the template and start the import
- On the Imports page, in the Students & parents card, press Download template for an Excel file laid out with the required columns.
- Press Start import to open the wizard.
2. Fill in the students' data in the template
Fill in one row per student. The template contains the following core data:
- The student's first name (and the template may include the father's and family names for the full name).
- Gender and date of birth.
- The guardian's mobile number: the key to the family link; the student is linked to the guardian holding that number, which must already belong to a guardian.
Do not worry about the order of the columns or matching their names exactly; the Map columns step takes care of that next.
3. Upload the file (the File step)
Drag the file into the upload area or press Choose file, then press Upload & continue. The system reads your file's columns and prepares the mapping step.
4. Map the columns (the Map columns step)
The system tries to match your file's columns to Skool.Cool's fields automatically and shows a sample of the values in each. Review the mapping, complete any unmapped mandatory field, then press Validate rows.
5. Review the validation results (the Validation step)
The system shows the number of rows by state: Valid, Warning, Error. You have two options:
- If there are errors: press Download error file for a copy with the reason for each problem set out beside its row, fix the rows and upload the file again. Or carry on with the good rows only, using Import valid rows only.
- If the file is clean: press Continue to preview.
6. Preview, then run (the Preview and Import steps)
Preview shows a summary of what will happen before anything is saved: To create, To update and To skip. To confirm an operation touching a large number of records, you may be asked to type the number. Press Start import to begin, and you can leave the page — the import finishes in the background.
What you should end up with
- The Results step appears with a summary: Imported, Skipped and Failed.
- The new students appear under Students, and their guardians under Parents.
- Guardians receive no notification, and the import creates no accounts for them: each student is linked to their guardian's existing account by mobile number, and the guardian sees the children linked to them straight away.
- The usual next step: create the activities and then register the students in them. A guardian who has not created an account yet creates it themselves in the parents app, and the student's row is then imported again (see Importing parents).
Frequently asked questions
What is the difference between importing students and importing parents?
The Students & parents import creates the student and links them to the guardian's existing account with that number; it does not create new guardian accounts. No import in the admin portal creates guardian accounts: a guardian creates their own account in the parents app with their mobile number, and the import then links their student to it. The details are in Importing parents.
Why did some rows come out as "Error", and what do I do?
On the Validation step, press Download error file for your file with the reason for each problem added beside its row, then correct those rows and upload again. And if you want to proceed with the good ones only, press Import valid rows only. The validation rules are detailed in Reference: columns.
How do I know what will change before I run the import?
The Preview step shows the To create, To update and To skip counters before anything is saved, and may ask you to type the number of records affected to confirm. Nothing is written to the database until you press Start import.
My file's columns have different names — will the import work?
Yes. The Map columns step matches your file's columns to Skool.Cool's fields automatically where it can, and lets you map any column by hand. Complete the mandatory fields, then press Validate rows. For the required fields, see Reference: columns.
I made a mistake and imported the wrong data — how do I undo it?
Open the completed import operation and press Undo import; it removes the records that operation created. Any record edited or used since the import (a new registration, a manual edit, publishing or cancelling the activity, adding a session or a group placement) is excluded from the undo and stays as it is, whoever made the change, including you. Parent accounts always stay: the undo never deletes or locks a parent account, because the account belongs to the owner of that phone number.
Where do I find the import permission if the screen does not appear?
The import permission is granted according to your role at the school. If Imports does not appear in the Today's work menu, ask your school administrator or see Access control and roles to set your team's permissions.
A job called "family link suggestions" appeared in recent jobs and I uploaded no file. What is it?
This kind is not uploaded as a file by the school. The platform prepares it automatically by matching student records in the school system against guardian accounts, and it then appears to you for review and approval only. Approving it creates no student and no guardian: all that happens is that a guardian sees a card in their app saying the school shows they also have another child, and they alone confirm or decline. A declined suggestion is not shown again. If a child's date of birth did not come through from your file, the app asks the guardian for it at confirmation rather than rejecting the suggestion. If you see a family in the preview that does not look like one of yours, do not approve the job and tell us.